Bait Effects and Rebirth Requirements
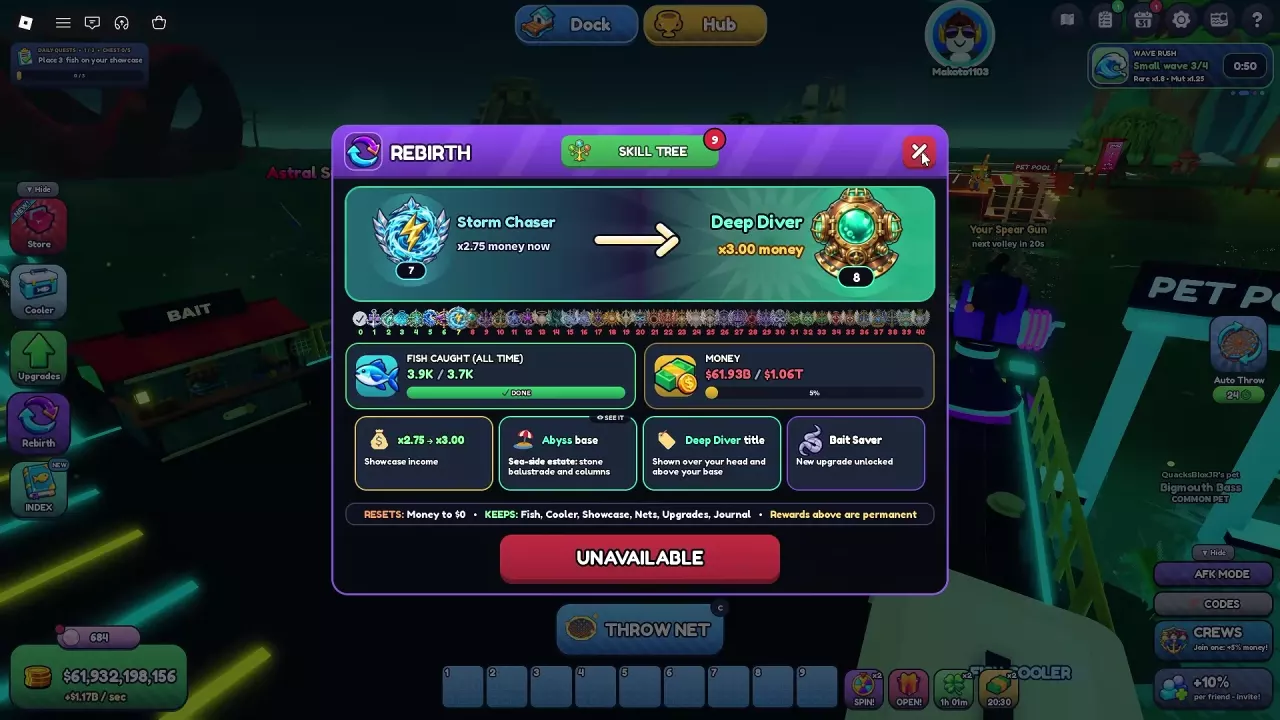
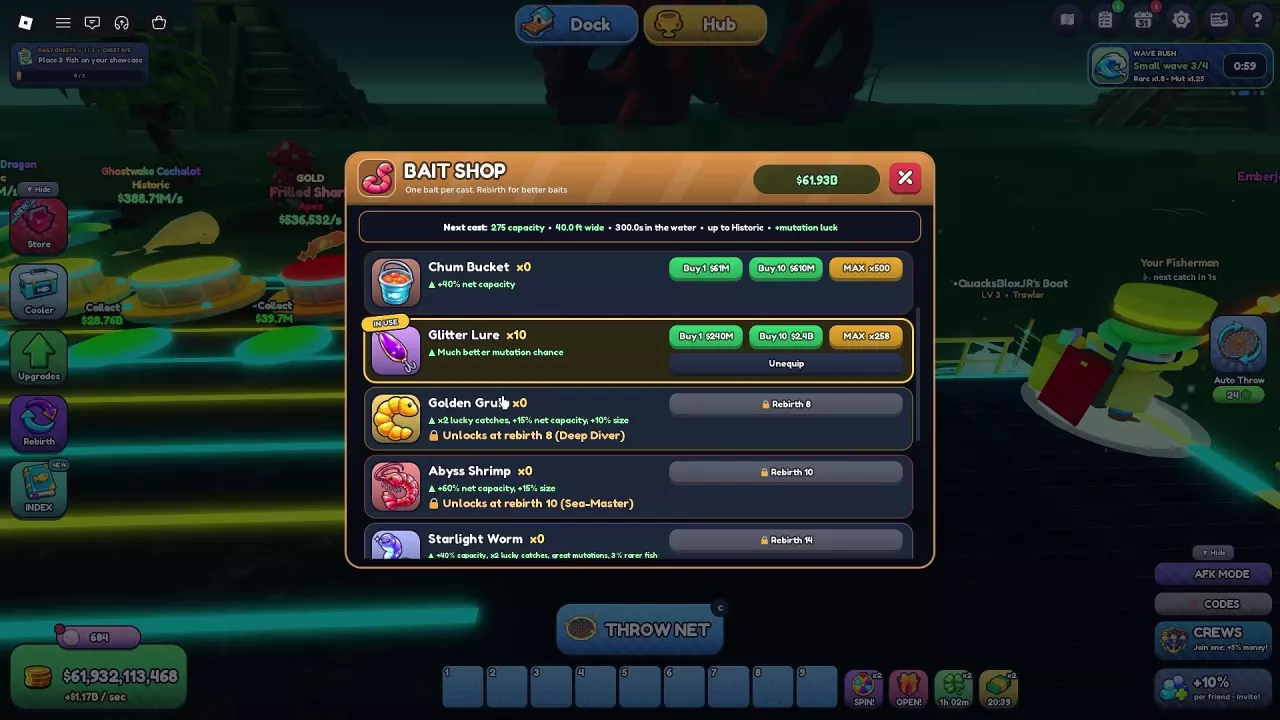
Bait bonuses apply to your net casts, and you can equip one bait type at a time. Locked options show the required Rebirth level; meet that requirement before buying them. See the Rebirth guide for progression requirements and resets.
Prices depend on your progression setup and discounts. Compare each price with its accompanying condition, and use your current shop quote when budgeting a purchase.
Lucky catches, double haul, rarer fish, and mutation bonuses are separate effects. A ×2 lucky-catches bonus does not mean twice as many fish, and a ×1.5 double-haul bonus does not guarantee an extra fish on every catch.
Choose Bait for Capacity, Size or Mutations
| Your goal | Recommended bait | Why choose it? |
|---|---|---|
| More room in an early net | Bread Crumbs; Chum Bucket at Rebirth 2 | Bread Crumbs adds 20% capacity. Chum Bucket raises that bonus to 40%, making it the stronger capacity choice when you can afford the refill cost. |
| Larger, heavier fish | Nightcrawlers | Its 15% size bonus targets fish size directly; larger, heavier fish earn more money. |
| Focus on mutations | Glitter Lure at Rebirth 6 | It greatly increases mutation chance, making it a focused choice when mutations matter more than capacity or size. |
| Lucky catches with useful side bonuses | Golden Grub at Rebirth 8 | ×2 lucky catches comes with 15% extra capacity and 10% extra size. Choose it when you want all three benefits. |
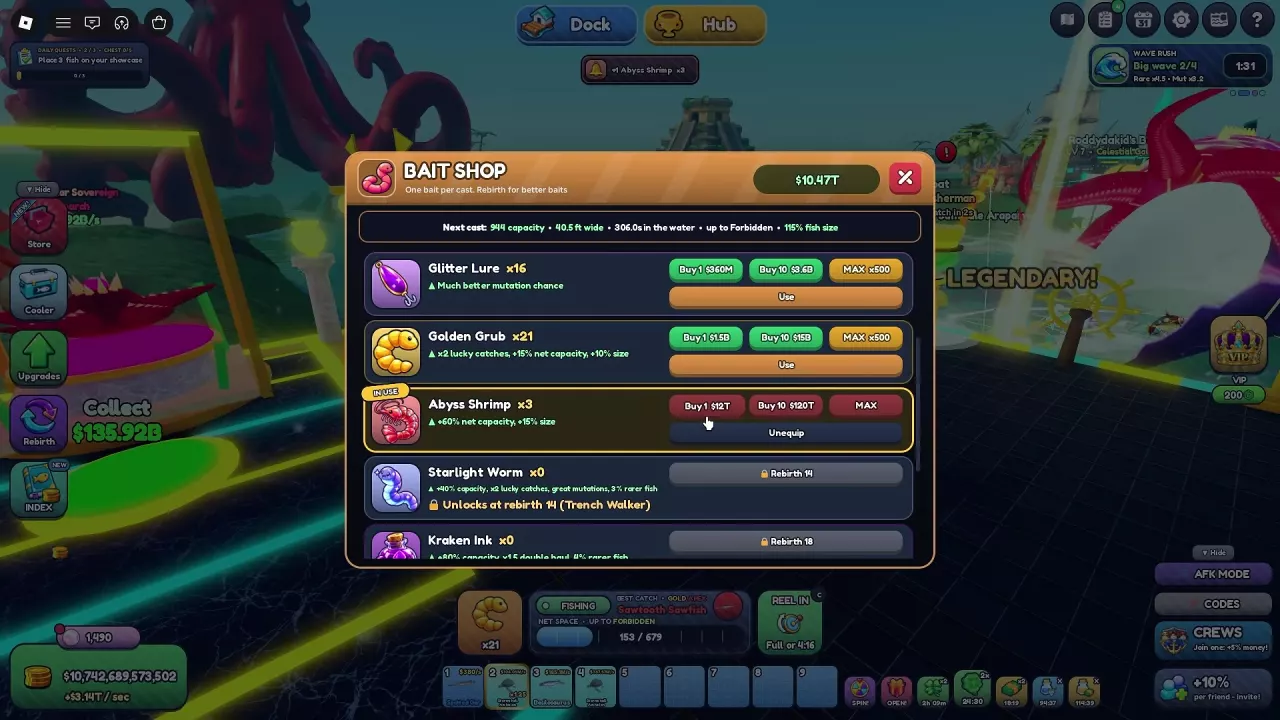
| More capacity and size than Golden Grub | Abyss Shrimp at Rebirth 10 | Its 60% capacity and 15% size bonuses favor fuller nets and larger fish, but switching gives up Golden Grub’s ×2 lucky catches. |
| A mix of capacity, luck and mutations | Starlight Worm at Rebirth 14 | It combines 40% capacity, ×2 lucky catches, “great mutations,” and 3% rarer fish. It is a useful all-around choice when you want mutation hunting and lucky catches together. |
| Catch quantity in later progression | Kraken Ink at Rebirth 18 | Its 80% capacity bonus and ×1.5 double haul favor quantity, alongside 4% rarer fish. Choose it over Starlight Worm when capacity and double haul matter more to you than its luck and mutation combination. |
| Large fish with mutation bonuses | Phoenix Feather at Rebirth 22 | It combines 60% capacity, 25% size, “huge mutations,” and 5% rarer fish. This is the focused late-game choice for size and mutations together. |
| Maximum bait capacity with size and double haul | Void Pearl at Rebirth 26 | Doubled capacity, 30% extra size, ×1.5 double haul, and 7% rarer fish make it the strongest capacity option among these ten baits. Choose Phoenix Feather instead when its mutation effect is your priority. |
Golden Grub vs. Abyss Shrimp
Keep Golden Grub for its lucky-catches combination; switch to Abyss Shrimp when extra net space is worth the current purchase cost. The higher unlock does not make Abyss Shrimp a replacement for every Golden Grub use.
For example, in a Forbidden setup, switching from Golden Grub to Abyss Shrimp changed the Next cast preview from 679 to 944 capacity and from 110% to 115% fish size, while removing ×2 lucky catches. Width stayed at 40.5 ft, time in water stayed at 306 seconds, and maximum catch rarity stayed Forbidden. This is a capacity-and-size tradeoff, not an increase to every fishing stat.
For a mutation goal, choose the bait’s mutation effect directly rather than treating lucky catches or rarer fish as equivalent. The mutation guide explains mutation types and other ways to obtain them.
Buy, Equip and Switch Bait
Have enough cash for the purchase and meet the selected bait’s Rebirth requirement, then:
- Approach the BAIT stand on your dock and press E to open Bait Shop.
- Choose Buy 1, Buy 10, or MAX. MAX offers a quantity based on your available funds; its displayed quantity can change with your balance.
- Select Use beside the bait you want. Confirm that its row displays IN USE and Unequip. Buying a different bait does not necessarily switch your active type.
- Read the Next cast preview at the top of the shop. It shows capacity, width, time in water, maximum catch rarity, and active bait effects for your combined setup.
- Close the shop and cast your net. To switch later, select Use on another owned bait. To remove the active bait, select Unequip.
When switching from Nightcrawlers to Glitter Lure, the size effect is replaced by mutation luck in the preview. Use that feedback to confirm the bonus you want for your next cast. For aiming and reeling controls, see the fishing guide.
Consumption, Restocking and Savings
Each net cast normally consumes one unit of your equipped bait. Automatic net casts consume it too, so stock up before an extended online AFK session. When the supply runs out, net fishing continues without bait. Return to the BAIT stand or bait bucket on your dock to buy more, then check the active bait before continuing.
Open Upgrades → Market for two ways to reduce bait spending:
- Haggler reduces the purchase price. Through level 10, its discount increases by 3 percentage points per level: level 8 gives 24% off and level 10 gives 30% off. Use the discount shown for your current level when comparing refill costs.
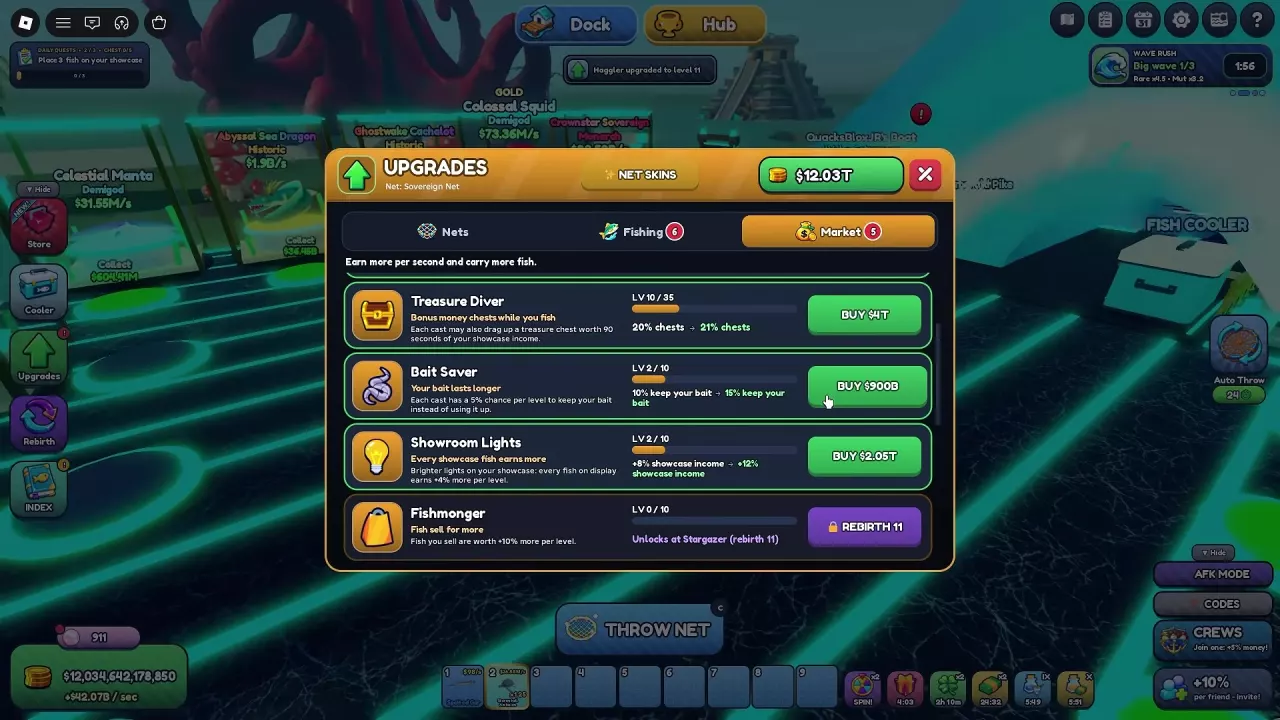
- Bait Saver reduces consumption. It unlocks at Rebirth 8, Deep Diver, and adds 5 percentage points of preservation chance per level, up to level 10. At level 10, each cast has a 50% chance to preserve its bait. This is a chance on each cast, not a guarantee that every second cast is free.
Haggler helps when you buy stock; Bait Saver helps that stock last through more casts. For the other Market options and spending priorities, see Market upgrades.
FAQ
Is Lucky Bait the same as bait from the Bait Shop?
No. Lucky Bait is a Fishing upgrade that improves rarity-upgrade luck. Bait Shop items are consumables that you buy, equip, and use on net casts.